Everything I know about starting seeds I learned from Quincy, Cisco Morris, or Willi Galloway of Diggin' Food. Cisco is my gardening hero. Because of him I remembered to soak our bare-root shrubs before planting. Someday, I hope he will be the officiant to marry Quincy and me.
There are a number of keys to getting great starts from your seeds. Unsurprisingly, the top two are, generally speaking, water and light.
You can find good seed starting protocols all over the web. I won't bore you with details on starting mix or the Ordering of Things. Starting guides I find in line with Willi's talk can be found at Organic Gardening and Avant-Gardening (and I'm sure there are others!).
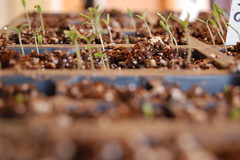
Using a starting mix instead of soil provides more appropriate absorption of water. There's no need for fancy fertilizer or nutrients, as the seed provides breakfast for our little plant. Pre-mixing the seed-starting mix in a bucket with water until lumpy and batter like prevents flooding. Last year, I carefully dolled out two seeds per cell in my trays, only to have the flooding from my first watering float them haphazardly. A trick we are using this year to avoid such a disaster is watering with only a spray bottle (brand new, cleaned). Covering the tray with a plastic lid (this year) or plastic wrap supported by chopsticks (last year) will keep the humidity high. So long as the medium doesn't dry out or start molding, you've got a good chance at successful seedlings.
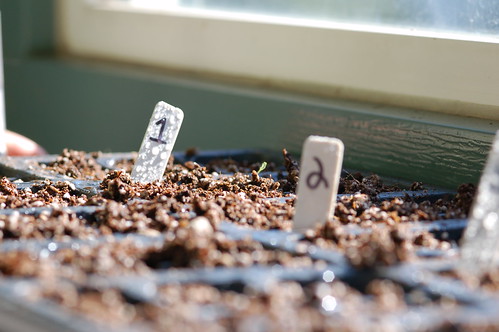
We like to chart and graph, so we labeled our plants pretty well. We're keeping track of first planting, first sprouts, first cotyledons (baby leaves), first real leaves, when we harden and when we plant. From there we'll probably track first buds and edibles as well. All of this can be used next year to adjust our seed starting to accommodate our own micro-climate (micro-climates are real -- we get lots more snow than the other side of Phinney Ridge just six blocks away!). Since all those plant names don't fit on the little plant labels, we made a hash table that identifies them and gives us plenty of room for notes.
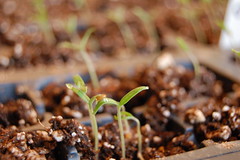
I built two grow lights (more on that later) for helping our seeds along. I don't really like the idea of using electricity to grow our plants, but in the dark Seattle spring, there's really no alternative. Also, we don't have sunny southern windows with a place for plants. The grow lights are placed only a few inches above the seeds (or tops of sprouts) to encourage stout plants. Last year all my plants were very leggy and leaned badly (no grow light and set out on the porch). We're giving these guys 16 hours of 26 watts. And here they come!
We decided not to use a starting mat (heat pad for dirt) because they're so pricey. If we don't get good results, we may change our mind for next year... but so far things are right on schedule.
So, that's what we're doing up to date. I'll write more as we do more.
I had mentioned that we knew when to start the seeds. Charts for figuring when to seed and set out plants based on last frost date can be found at Mother Earth News and Organic Gardening.


No comments:
Post a Comment